The Seaton Tramway
The Seaton Tramway is one of Britain's most popular leisure-themed transport systems.
Located in south-east Devon and just a few miles from the also popular Pecorama http://www.pecorama.info/  the Seaton Tramway re-uses much of the former mainline railway branch line between Seaton Junction & the village of Seaton which was closed in 1966. It operates a fleet of 'smaller sized' trams that run on narrow gauge 2 ft 9 in
(approx 84 cm) track. Three miles (approx 4.8 km) long, the tramway comprises a single track with many passing places - some of which are at stations. Most of the route is unsignaled, however at the southern
end of the line (between Seaton station and the Riverside Workshop) there are some sharp curves which are effectively blind bends, so for safety it emulates some single-track mainline railways and uses the 'staff & token' signalling
system whereby trams are only normally allowed to travel along this section of track if the tram driver is in possession of a physical device (ie: a token).
the Seaton Tramway re-uses much of the former mainline railway branch line between Seaton Junction & the village of Seaton which was closed in 1966. It operates a fleet of 'smaller sized' trams that run on narrow gauge 2 ft 9 in
(approx 84 cm) track. Three miles (approx 4.8 km) long, the tramway comprises a single track with many passing places - some of which are at stations. Most of the route is unsignaled, however at the southern
end of the line (between Seaton station and the Riverside Workshop) there are some sharp curves which are effectively blind bends, so for safety it emulates some single-track mainline railways and uses the 'staff & token' signalling
system whereby trams are only normally allowed to travel along this section of track if the tram driver is in possession of a physical device (ie: a token).
The route passes along the River Axe estuary, through two nature reserves and in addition to being popular with tourists and transport enthusiasts it runs special bird watching services so that ornithologists can also enjoy their hobby.
The tramway has its genesis in a miniature 15 inch (approx 38 cm) gauge tramway which its founder (the late Claude Lane) built in 1949 and was used at garden fetes. This was very popular and eventually became a mile-long (approx 1.6km) 2 ft (approx 61 cm) gauge tramway based in Eastbourne, Sussex. The tramway continued to be very popular and it was felt that a new larger home was needed so in 1969 it relocated to its present home in Devon. At the same time the track gauge was widened by nine inches to 2 ft 9 in (approx 84 cm) and the trams modified to suit. This track gauge was chosen as it allowed for larger trams to be built without making the existing fleet redundant. The tramway reopened at its new home in 1970 as a service between a temporary station near Riverside depot and a bridge part-way on the route to Colyford. The line reached the present-day terminus stations of Seaton in 1975 and Colyton in 1980.
The trams are electrified at 120 volts dc from four feeder stations. Because the tramway's founder previously owned a factory which built battery electric vehicles (such as milk floats) so the tramway benefits from his technical expertise and includes a battery power supply system which can act as a short term backup in case of mains (national grid) power failure.
A single journey in one direction along the full length of the tramway usually takes about 30 minutes, although waiting time at the intermediate station and / or at passing places may add a few minutes to the journey.
More information about the Seaton Tramway can be found at these links:
http://www.tram.co.uk/
http://en.wikipedia.org/wiki/Seaton_Tramway .

These images show some of the route and most of the tramcars.
They were sourced over many summertime visits spread over several decades, using a mixture of digital and 35mm film cameras.
One of the film cameras takes photographs in 'stretch' or 'panoramic' format, which explains the shape of some of the images seen here.
Additional images coming from online Creative Commons sources were added during page updates
in 2020 and 2024.
My most recent visit was in summer 2024.

When the weather permits there is no finer way to travel than on the upper deck of an open top tram,
however the fleet includes some fully-enclosed tramcars for those days when the weather is less favourable.
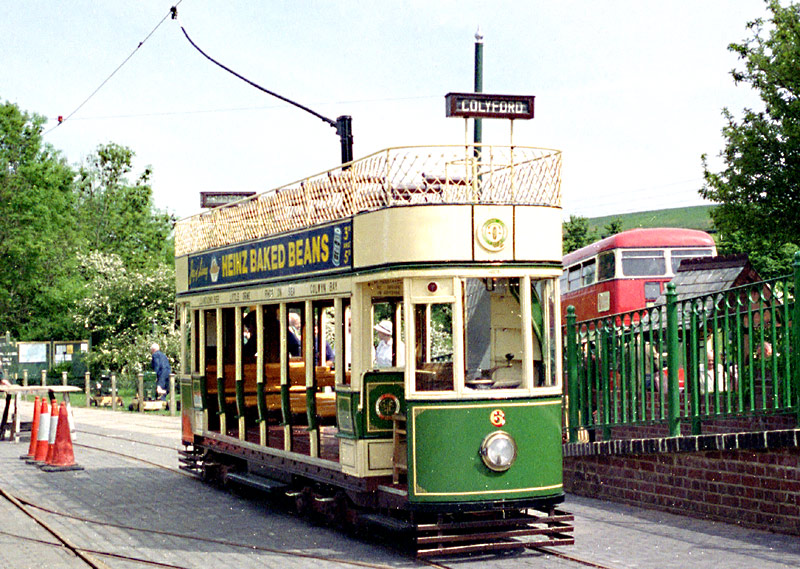
The Seaton Tramway is easiest to reach by private car, although there are some local bus services which serve the area too.
For special events there is sometimes a special bus link with Axminster railway station, which has direct trains from London.
The bus carries passengers to the northern terminus station (Colyton), this explains
why a former London Routemaster bus can be partially seen in this image.

Is there enough space for one more inside?
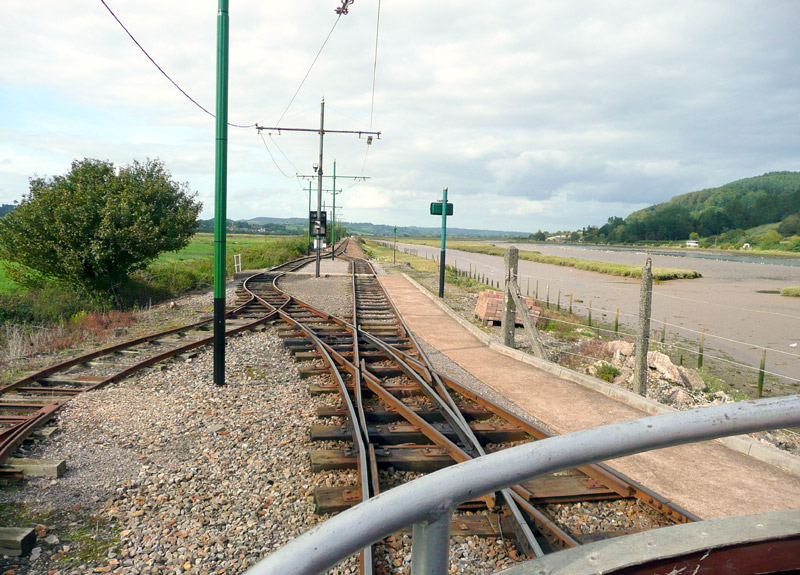
Clear line ahead. Lets Go!
This image shows the passing loop that is now the site of the Riverside Halt, in the days before this Halt was created.
The Stations (Tram Stops)
There are five stations - Seaton is the terminus at the southern end of the line, then there are two halts (Riverside Halt and Wetlands Halt), Colyford Junction (which is next to a level crossing) and finally Colyton is the terminus station at the northern end of the line.
At certain times the original terminus station at Riverside Halt, which is very close to the Riverside Workshop, is also used as an alternative to Seaton station.
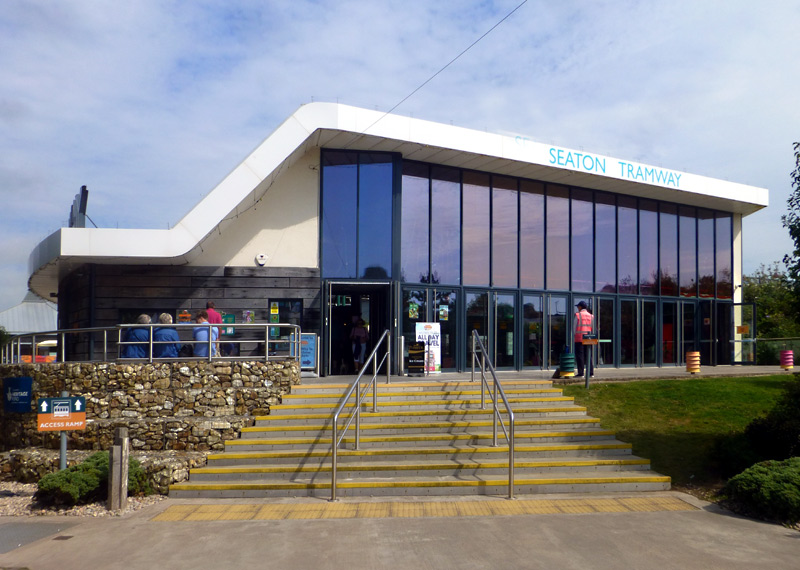
The fully accessible terminus station which is in the town of Seaton - the wheelchair ramp is on the left.
The station features four tracks and is fully weather protected.
There is also a cafeteria which serves light meals and other facilities.
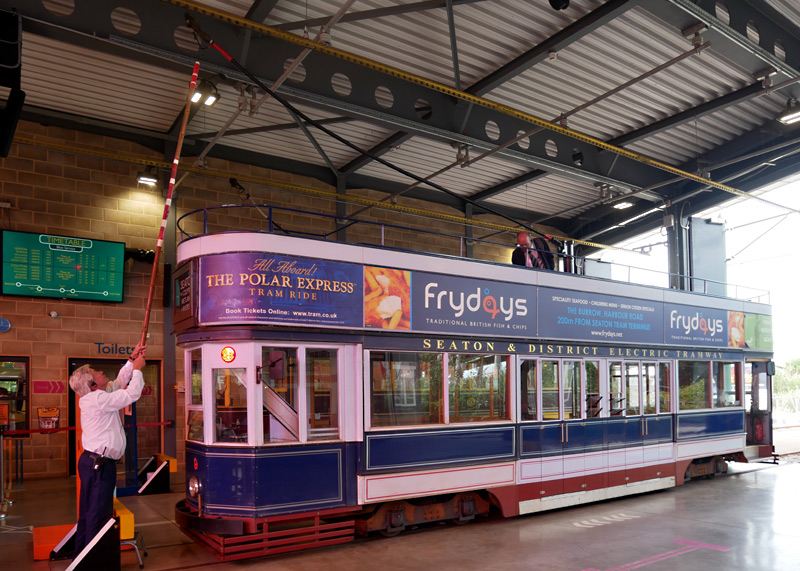
The trolleypole of tram №9 being connected to the overhead wires inside the Seaton Tramway terminus station.
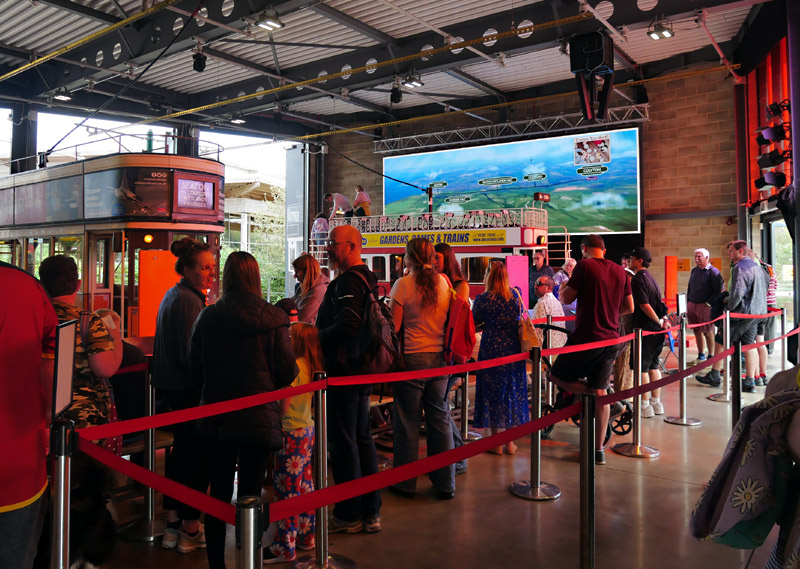
The station building was designed with an open space boarding area so that when trams are not running it can be used as a meeting room,
for social events and more. Here we see tram No.10 at track 2 and tram No.2 (with passengers alighting from the upper deck) at track 4.
On the wall behind this tram is a large visual display screen.
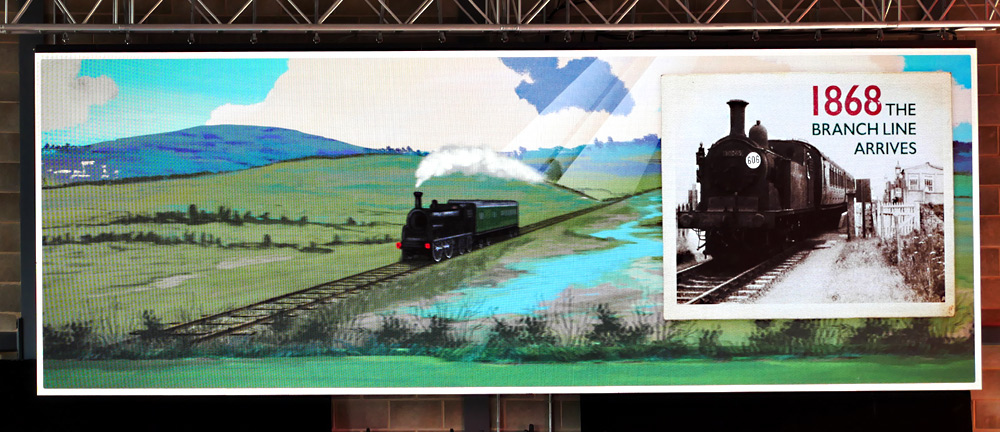
The large display screen was showing a short looping animation about the tramway, its history (as a mainline railway branch line),
things to see and do along its route, etc.
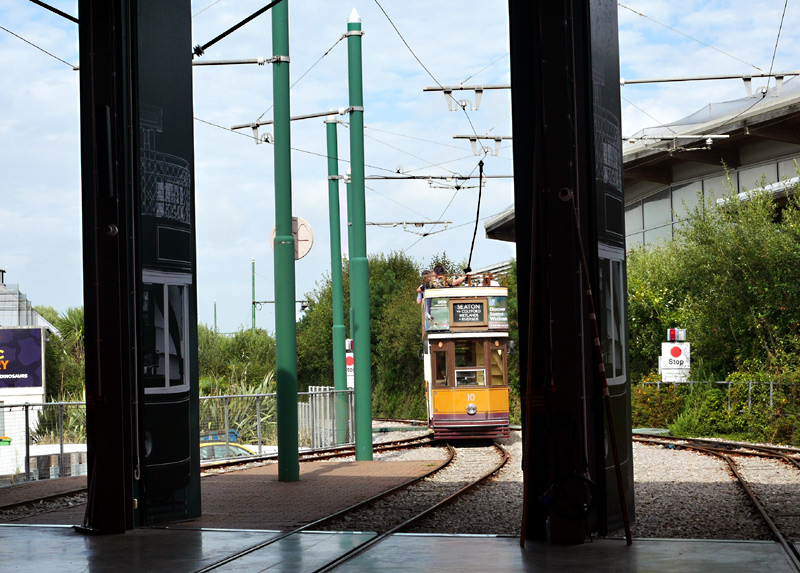
Tram No.10 has now departed from Seaton station and must wait for authorisation to enter the single track section between here and Riverside Halt.
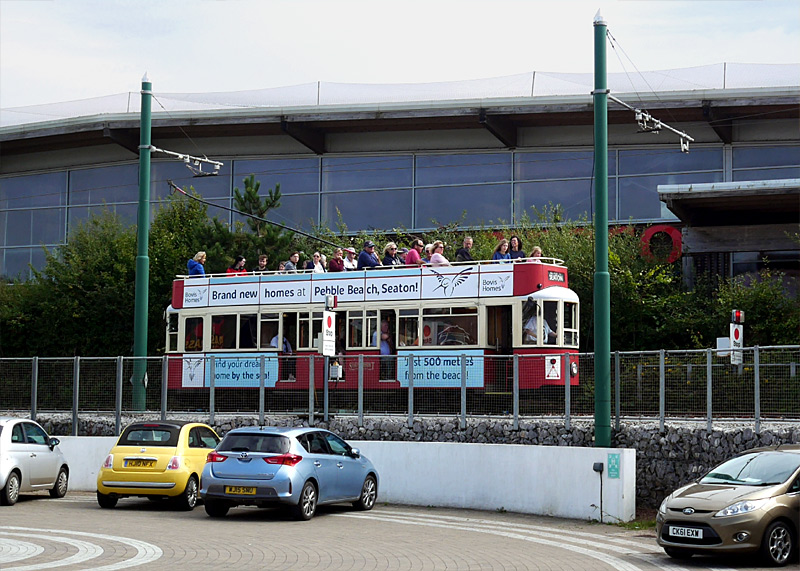
Tram No.12 arriving at Seaton station is about to pass the same location as seen in the image above - behind it (and the trees) is a large Tesco supermarket.
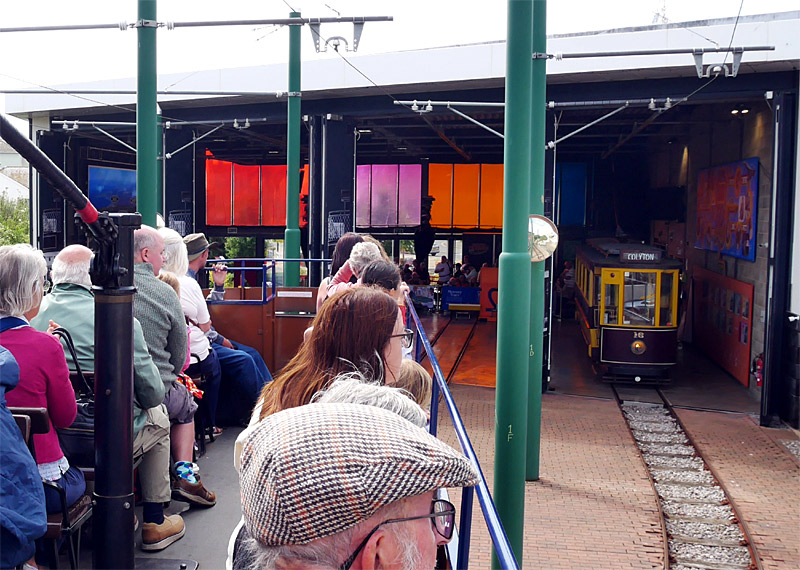
Arriving at the new Seaton station, as seen from the upper deck of tram No.9.
Filmed at approximately the same location as the image above.
The Two Former Stations At Seaton

The former Edwardian style Seaton station.
In the distance departing passengers are boarding red single deck tram No. 14
whilst to the right open top tram No. 6 is at the alighting point for arriving passengers.

'The tram is now ready for boarding'. Tickets are often checked as passengers board.
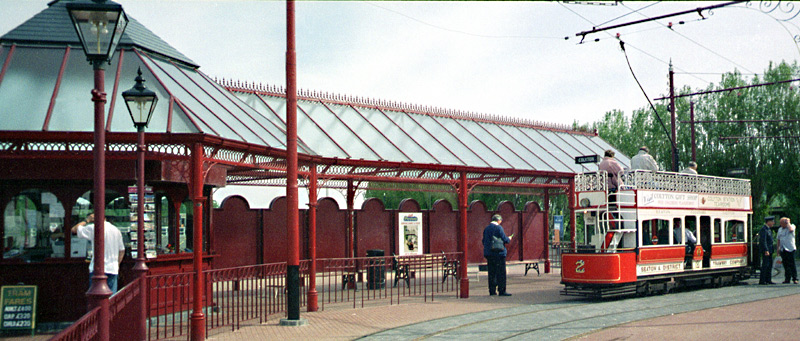
The Edwardian styled Seaton station featured a long covered waiting area for queuing passengers - although when this
image was taken everyone had boarded tram No. 2 and were awaiting the commencement of their journey.

Tram No. 9 on an extra working arrives at Seaton, as seen from the top deck of a tram that is waiting for No. 9 to pass so that it can depart.

A 'reversed' version of the above view of a tram arriving at Seaton.
On my Summer 2024 visit I noted that the pay and display car park had been replaced by a visitor attraction.

Having arrived at Seaton station passengers start to disembark from tram No. 4.

A 'reversed' version of the above view as seen whilst the driver turns
the trolleypole - under the watchful eye of some (not so) secret admirers.
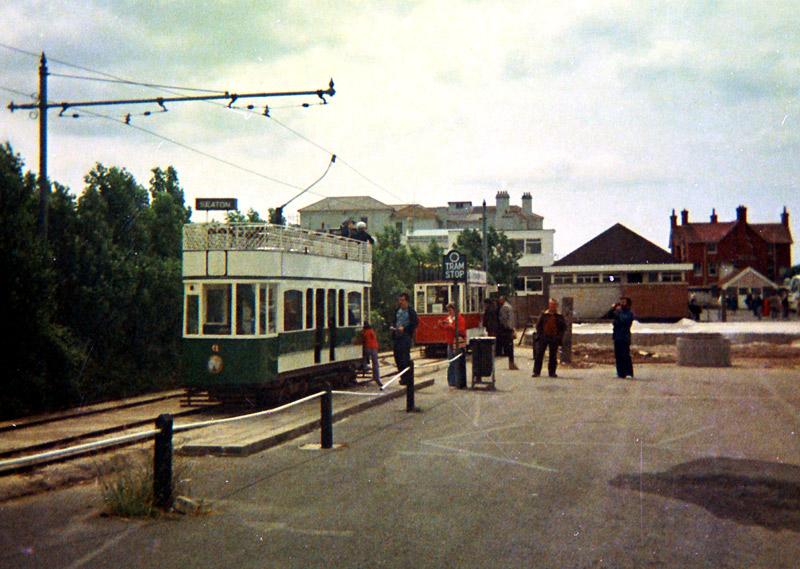
An even older view of Seaton station 'as it was' before the Edwardian station building was built.
Riverside Halt
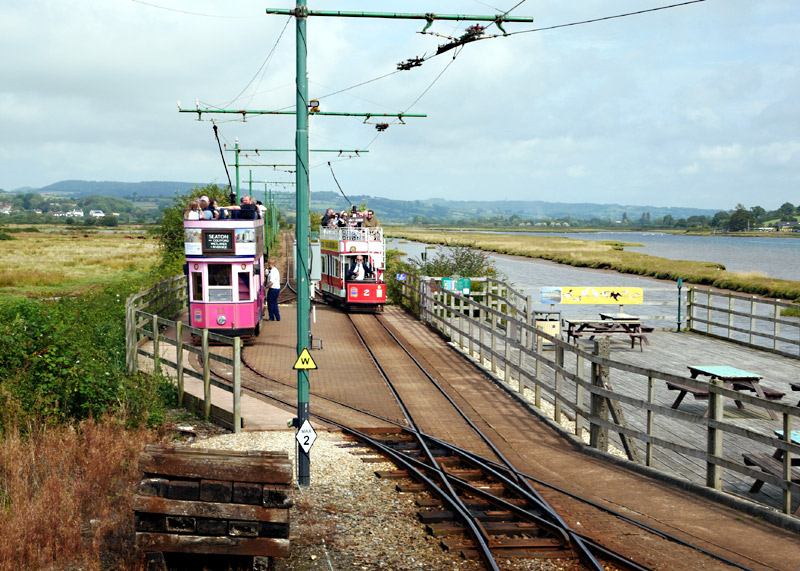
The first stop on the northbound journey towards Colyton is at the Riverside Halt. This is where the trams start to run alongside the River Axe. To make
it easier for bird watchers and other visitors to enjoy the local scenery a picnic area has been installed in the area between the track and the riverbank.
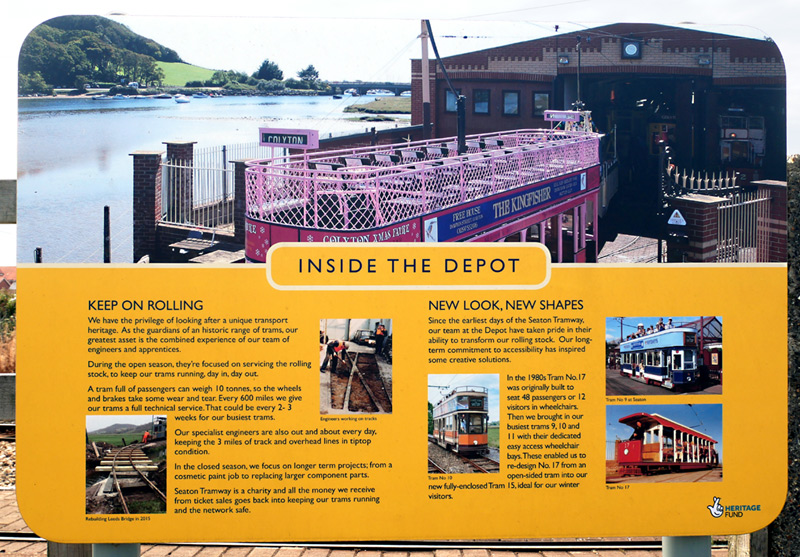
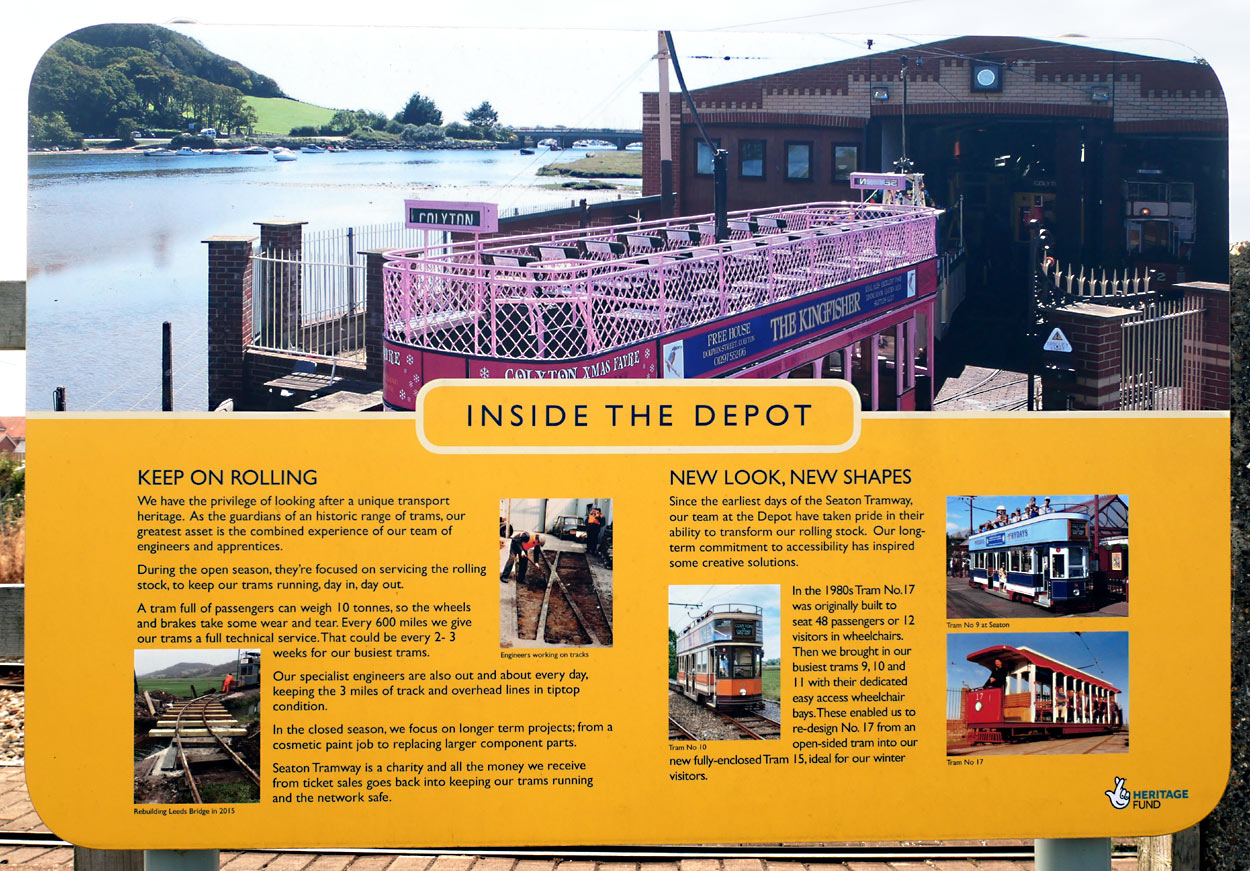
One of several information signs (at the Riverside Halt) about how the tramway operates.
To make it easier to read the text the link below leads to an extra large version which will open in a new web browser window.
http://citytransport.info/Digi2/P1810394xl.jpg
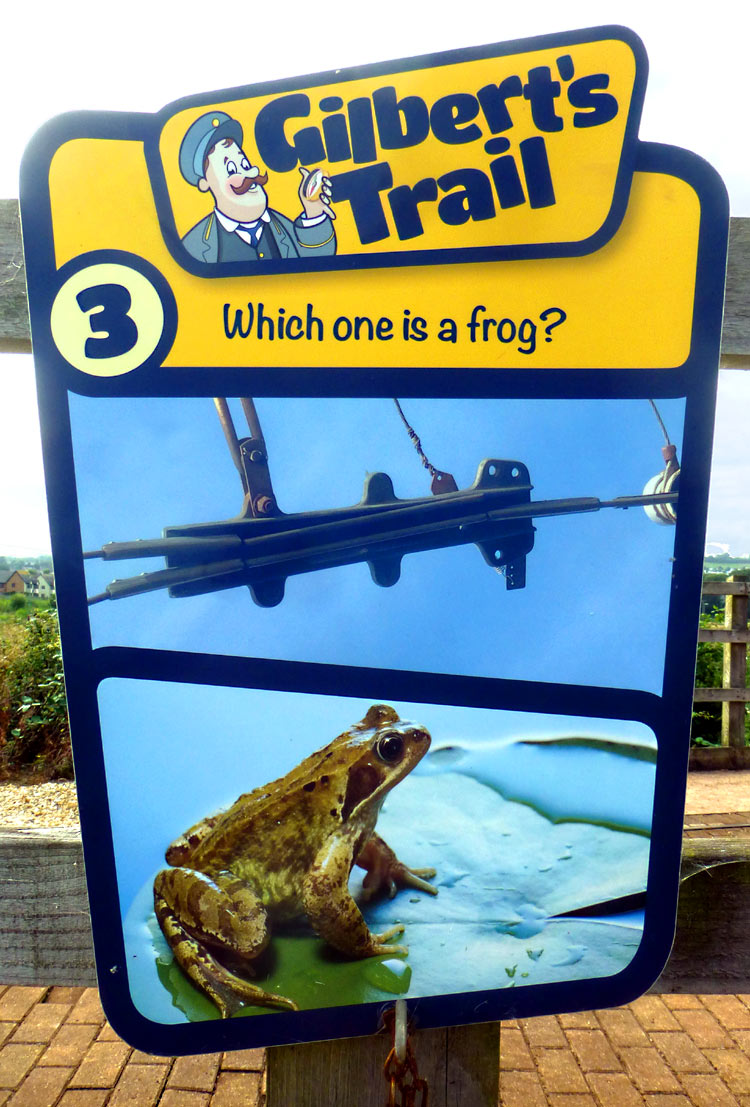
Another sign about how tramways work. There are also information displays about the many types of wildlife that can often be seen here and along the river. Some of these are on the picnic table tops - there is far too much to show it all on this webpage - you will have to visit the tramway to see everything!
Wetlands Halt
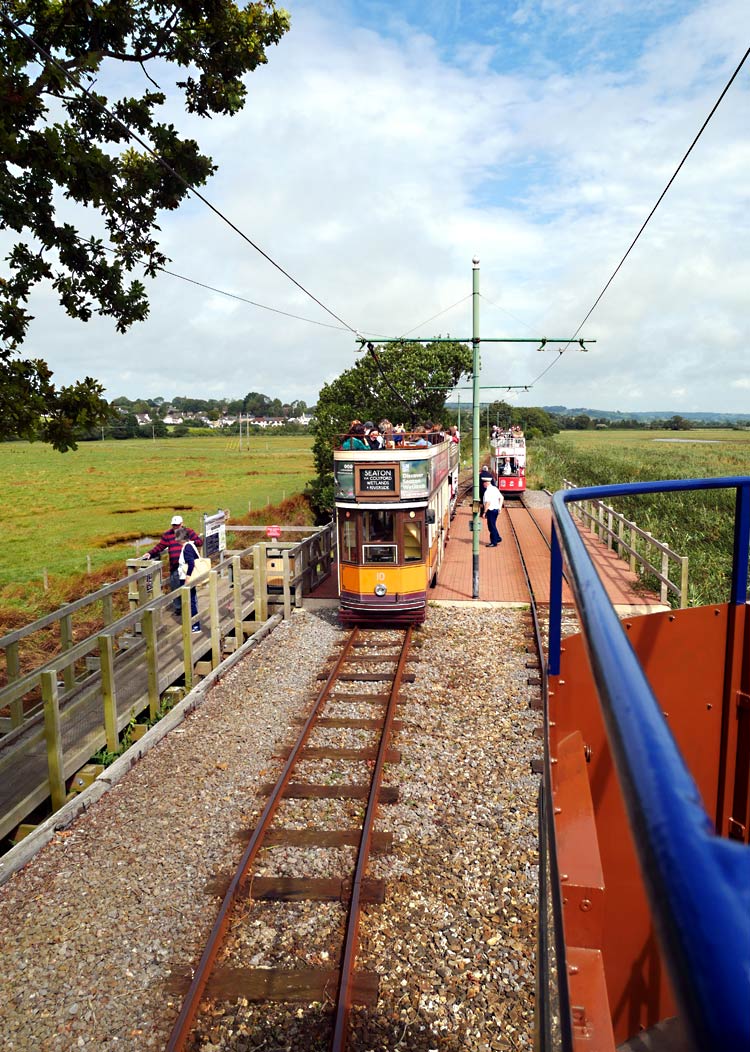
The next stop is Wetlands Halt.
From here there is an elevated footpath - seen to the left of the tracks - which leads to the local countryside.
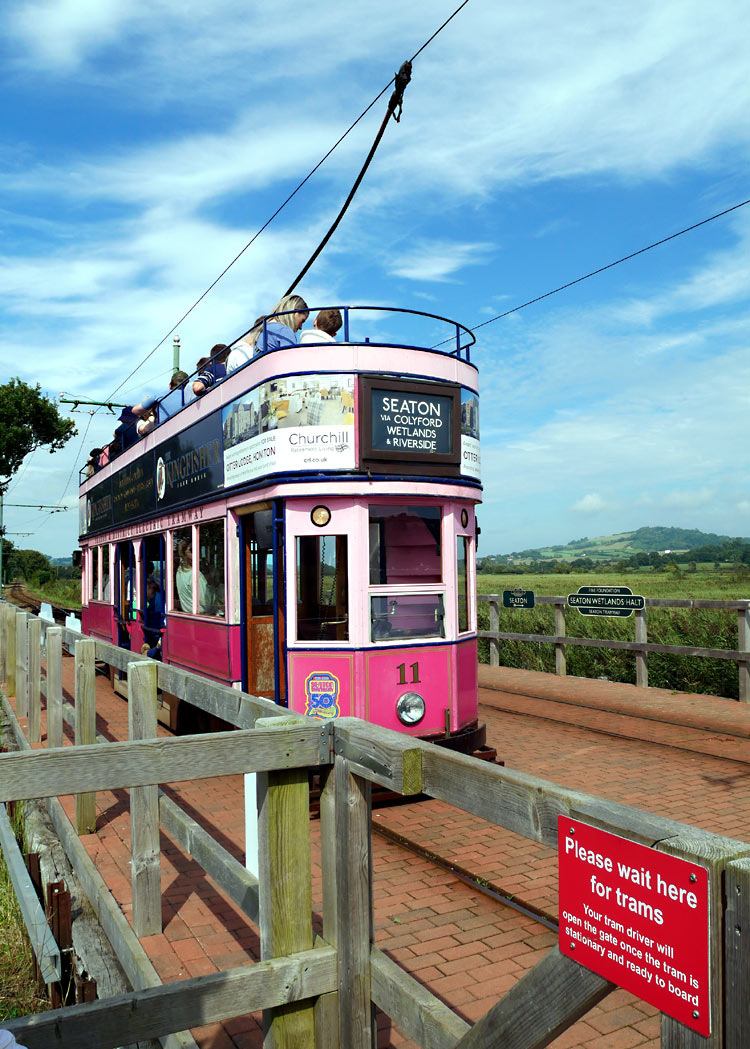
The elevated footpath from Wetlands Halt includes a space dedicated to people waiting for a tram.
The gate which leads on to the tracks is kept locked until the driver of a stationary tram opens it and allows passengers to pass.
Colyford Junction Station

The last intermediate station is Colyford Junction in the village of Colyford.
This is more of a station than a halt and it features several platforms which serve two through tracks plus a
side / bay track where trams that are not travelling further north can wait without blocking the through tracks.
Immediately to the north of this station there is a level crossing over a busy local road - this is explored in greater detail further down this page.
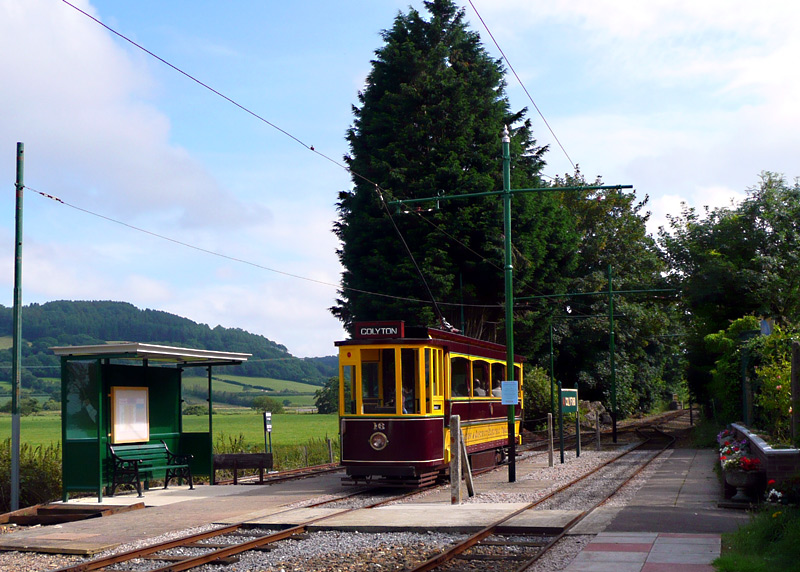
A view of Colyford station looking south, with me having just missed tram No.16 for a journey towards Seaton.

A short walk away from Colyford Junction used to be the Old Colyford Filling Station Museum.
This was a former filling station that had been converted into a museum dedicated to motoring memories.

Unfortunately this museum has now closed and the exhibits were sold at auction.
Colyton Station

The northern terminus is at Colyton station, which is a former mainline railway station that was closed in 1966
and has now been adapted for use by the tramway. This view shows the main entrance.

This is the first view arriving tram passengers see of the station.
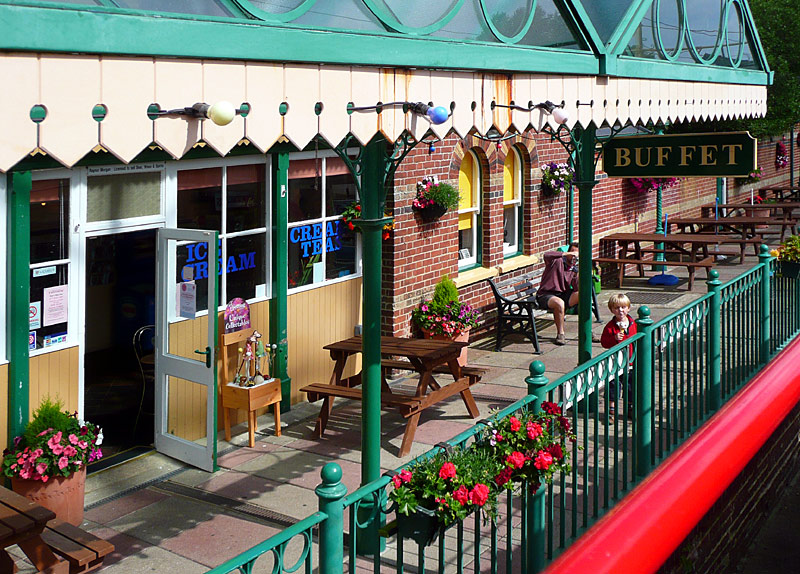
The adaption for the tramway included retaining the former railway station platform - which is now used as an outside seating area - and installation of twin tracks for the tramway. This view was taken on a tram that had just commenced its northbound journey towards Seaton.

No. 9 on an extra (and empty) working straight from the depôt passes through the station towards the passenger set down / pick up area.

On a warm summer afternoon it can be very pleasant to sit outdoors eating food bought at the buffet and listening to a live band.
This view was taken looking north.

After passing the station platform the trams pass a delightful lawned area before arriving at the unloading point.

A second view of this lawned area, it is to be hoped that the people who live here like trams!

The line ends at a simple stub terminus. On the right can be seen a queue waiting to board a tram back towards Seaton.

Passengers boarding No. 10 for their return journey to Seaton. There is a siding to the left of tram No. 9.
Above is a "YouTube" video showing many trams at Colyton station as filmed in the 1990s (S-VHS video) with a little extra footage from 2007 (SD video) http://youtube.com/watch?v=IlmI844CaNA
The Trams
Some of the trams are relatively modern builds which have been styled to look somewhat like first generation trams from various systems around Britain, whilst others are historic vehicles which have been modified to work on this tramway's 2ft 9in (approx 84 cm) narrow gauge track.
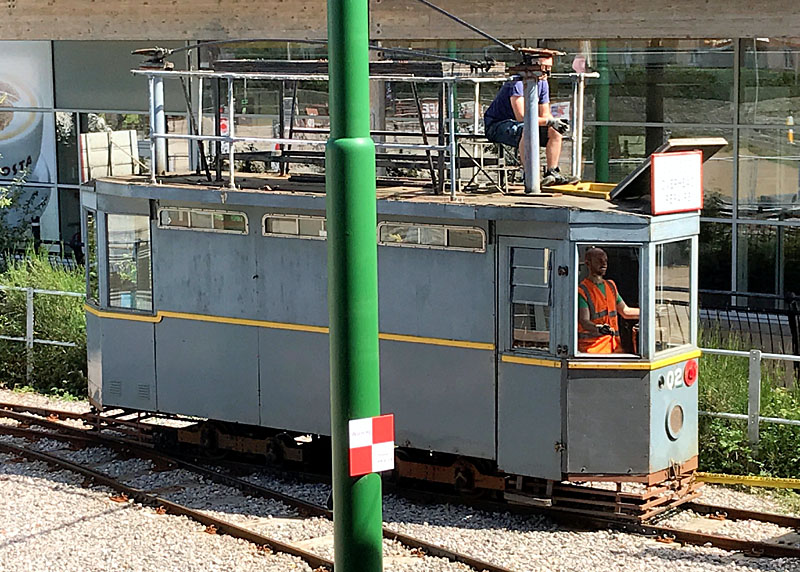
Tram No. 02, a freestyle works tram built in 1952 which is not designed to carry passengers.
Image & license: Timothy Titus / Wikipedia encyclopædia. CC-BY-SA-4.0 https://commons.wikimedia.org/wiki/File:Seaton_service_tram_02.jpg
Trams Nos. 03, 04, 05 are also non-passenger works (etc) trams and not shown here. Note the leading zeros in their fleet numbers.

Tram No. 2, seen here leaving Colyton on a southbound journey, dates from 1964 when the Seaton tramway was still in Eastbourne, Sussex.
It is based on the London Metropolitan Tramways type A design and despite being a double decker seats just 35 passengers.
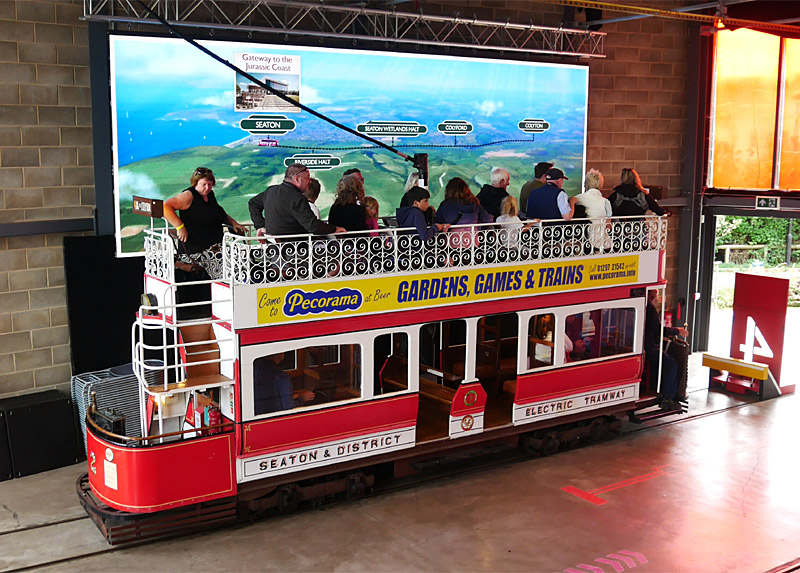
This side elevation of tram No.2 immediately after it had arrived at the new Seaton station and before anyone had began to alight from it. This was
filmed from the upper deck of another tram and this point of view looks very similar to that experienced by people who build model tramway layouts!

Tram No. 4, seen here with passengers embarking at the Edwardian styled Seaton station building prior to another
land cruise in a Blackpool-style open boat which dates from 1961 and features 20 Glasgow Standard single seats.

The trams at Seaton generally use recovered controllers that originally came from scrapped trams which used to operate in
various towns and cities in Britain - or Lisbon in Portugal. The controller seen here is fitted on tram No. 4 is a Dick Kerr DB1 K33E
which originated from Darwen and Llandudno / Colwyn Bay (North Wales).
Trams Nos. 6, 7, 8 all include style elements from the ten Bournemouth trams which after that system closed in 1936 were sold to the Llandudno & Colwyn Bay tramway.

Tram No. 6 dates from 1954.
Originally it was a Llandudno & Colwyn Bay style single deck tram with toastrack / crossbench seating
but was rebuilt as a double-deck tram. It seats 39 passengers.
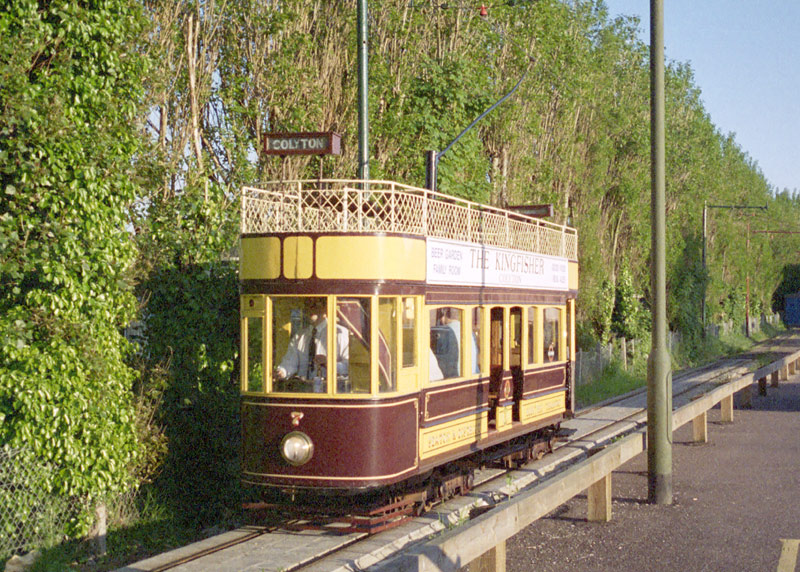
Tram No. 7, seen here on a northbound working passing the car park that used to be near to the Edwardian Seaton station, dates from 1958.
It seats 37 passengers. At the time of this page update (January 2025) this tram is not in service whilst it awaits a scheduled overhaul.

Tram No. 8 dates from 1968. This was the first tram to be built for the wider Seaton 2' 9" / 84 cm gauge and it seats 43 passengers.
This side view of tram No. 8 (at the Edwardian Seaton station) was taken in the days when it wore a yellow livery.
In 2008 it was painted bright pink in connection with a breast cancer awareness promotion - it is seen in this format elsewhere on this page.
These views of tram No. 8 show the 'toastrack' (crossbench) style seating which comprises closely spaced full width bench seats. The name 'toastrack' is used because this style of seating mimics the tableware item which holds toast. The only ways to move forwards or backwards within the tramcar are by either climbing over the seats or waiting for the tram to call at a tram stop ... alighting from the tram ... and then re-boarding it at a different seating area.
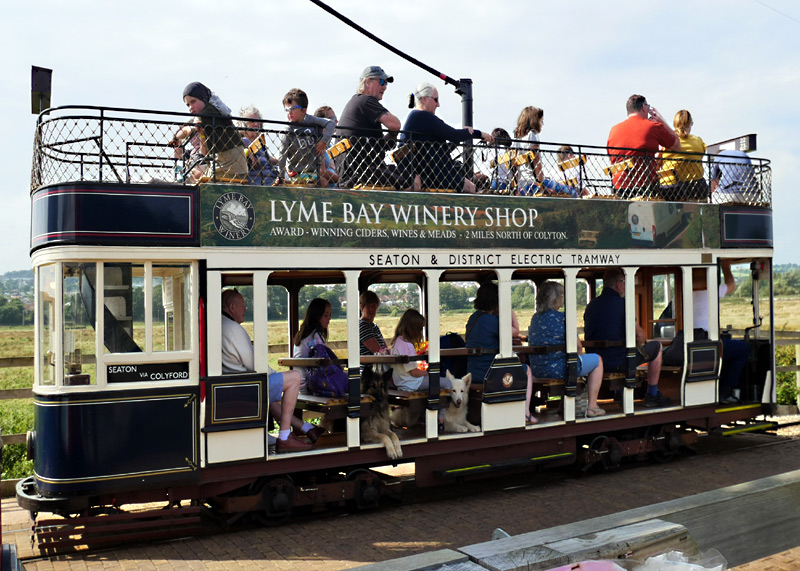
A side elevation of tram No.8, showing its Bristol blue and cream livery.
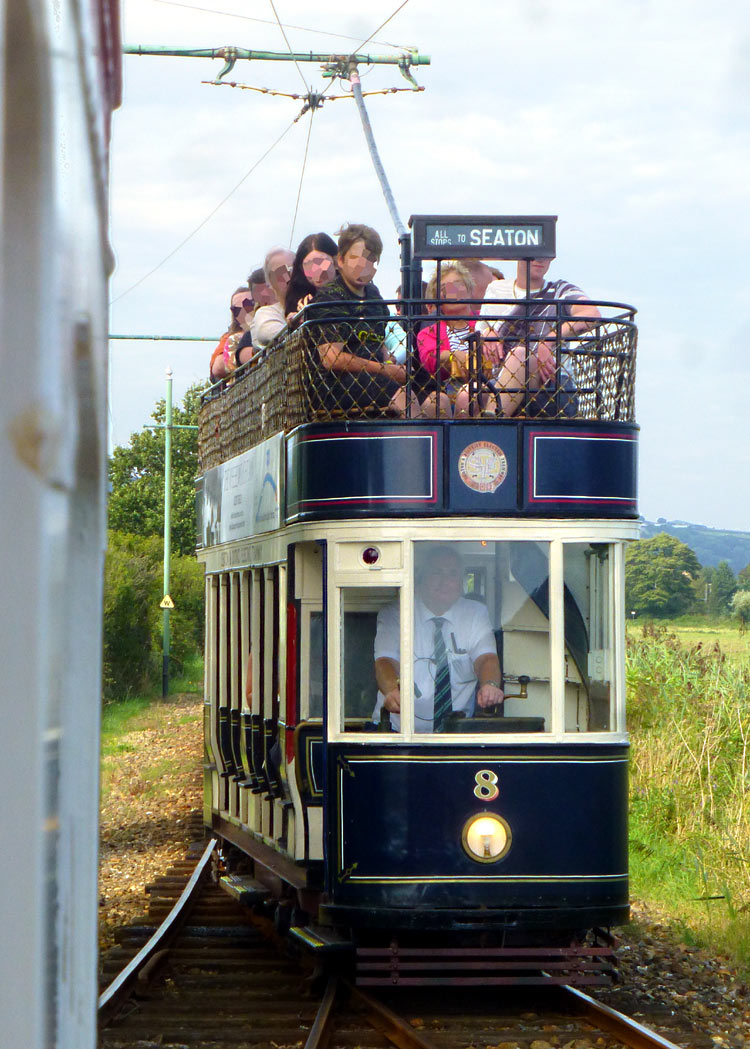
A forward view, showing the tram's number.
Trams Nos. 9, 10, 11 are a batch of three trams which were designed in-house using design elements from Plymouth and Blackburn tramcars, and include a wheelchair accessible centre section on the lower deck. They are all described as being built between 2002 - 2007.

Tram No. 9 was launched in 2004. It seats 56 passengers and is in the unique three-tone blue livery of the Glasgow Corporation Tramways
experimental tramcar No. 1005 of 1947. This view dates from my 2008 visit, in 2023 this tram was fitted with lower deck doors.

A closer view of the plaque seen on the side of No. 9 in the image above.
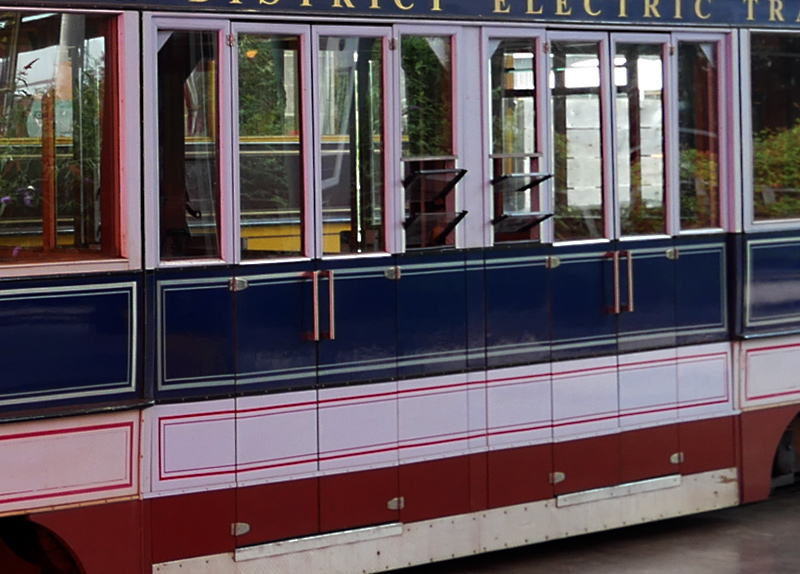
The lower deck doors which were fitted to Tram No.9 in 2023.

The lower deck also includes two fully enclosed sections which feature upholstered longitudinal seating.

Tram No. 10, seen here at Seaton station's unloading point, is nearly identical to tram number No. 9 seen above except that
it is in the more traditional green / orange / cream Glasgow livery.

Standing on the top deck of tram No. 10 looking down at the space restricted twisting stairway which is typical of double deck trams of 'yesteryear' and even of many present-day double-deck bus designs.

A study of tram No. 10's end platform showing the driver's position and the stairway. Note the lack of seating for the tram driver.
At one time it was expected that tram drivers would stand whilst driving the tram, however nowadays modern tram designs allow
the driver to be seated. As some other images show, here on the Seaton tramway the drivers might use a portable stool type seat.
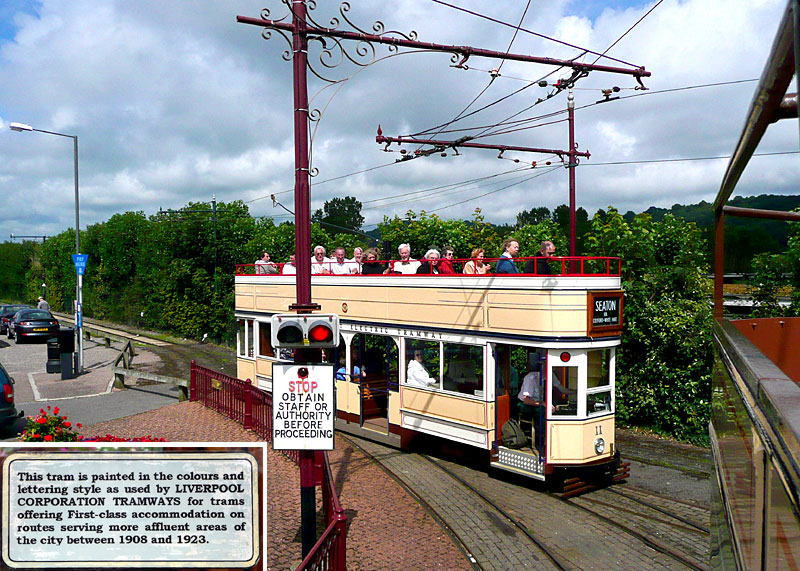
Tram No. 11, seen here arriving at the Edwardian Seaton station, was launched in 2007.
This photograph shows No.11 wearing an all-over livery of cream with gold lining. A plaque on the tram (see inset) says
that this livery was used on services dedicated to wealthy passengers in the city of Liverpool who wished to travel 'first class'.
This plaque quotes dates of 1908 - 1923. Another source of history quotes different dates and there only having been seven
'first class' trams, but they may have been referring to just specific tram routes rather than the existence of these trams per se.
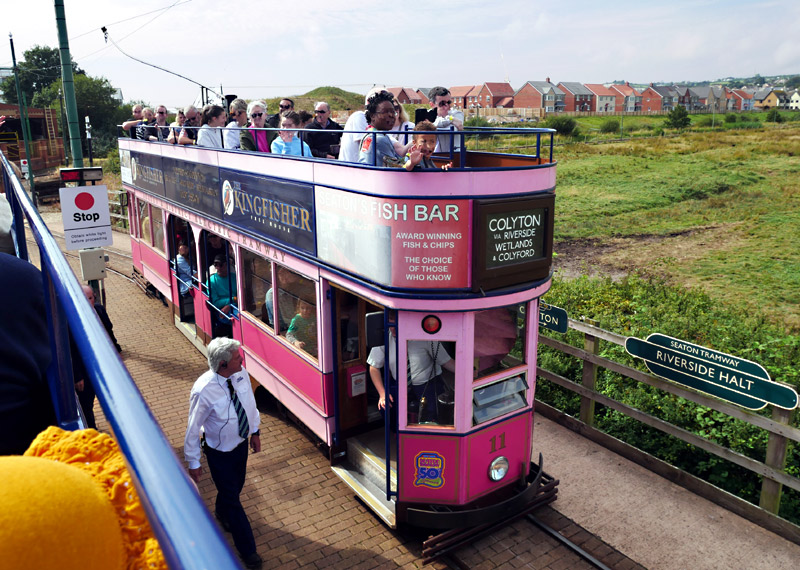
Tram No.11 after its 2011 was repainting in to a bright pink livery in connection with a breast cancer awareness promotion.
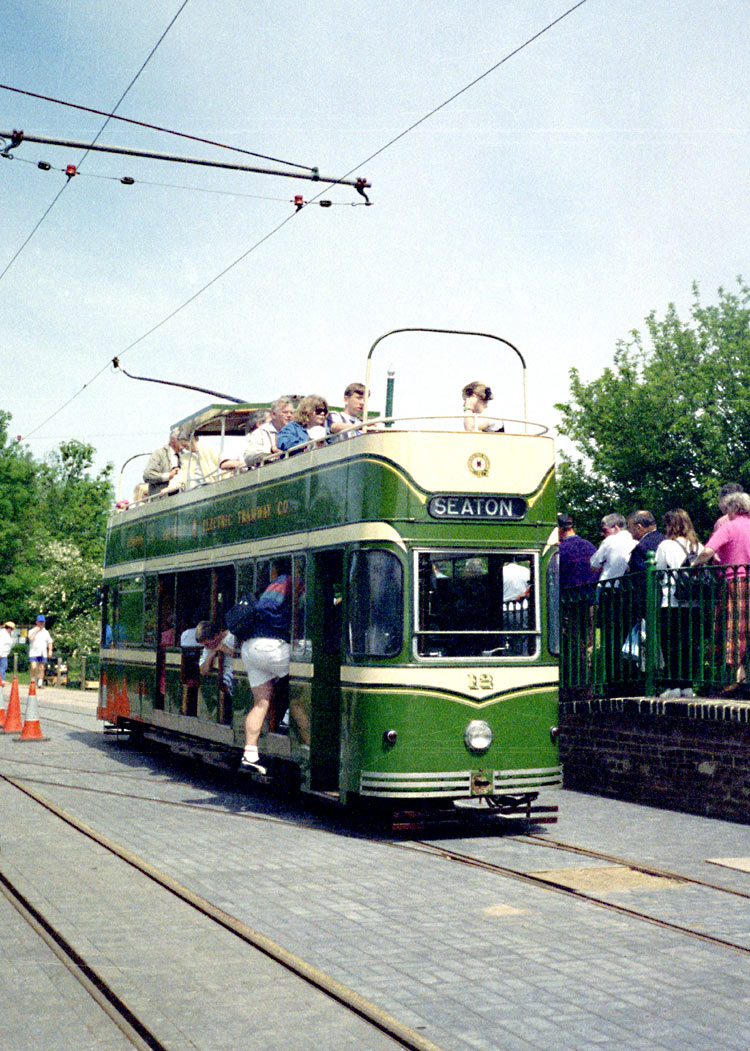
Tram No. 12 dates from 1966 and seats 50 passengers. Originally this was a single deck tram but in 1980 it was rebuilt to look somewhat like
a cross between Liverpool Green Goddess and Blackpool Balloon trams. This 1996 view was taken at Colyton station's boarding point.
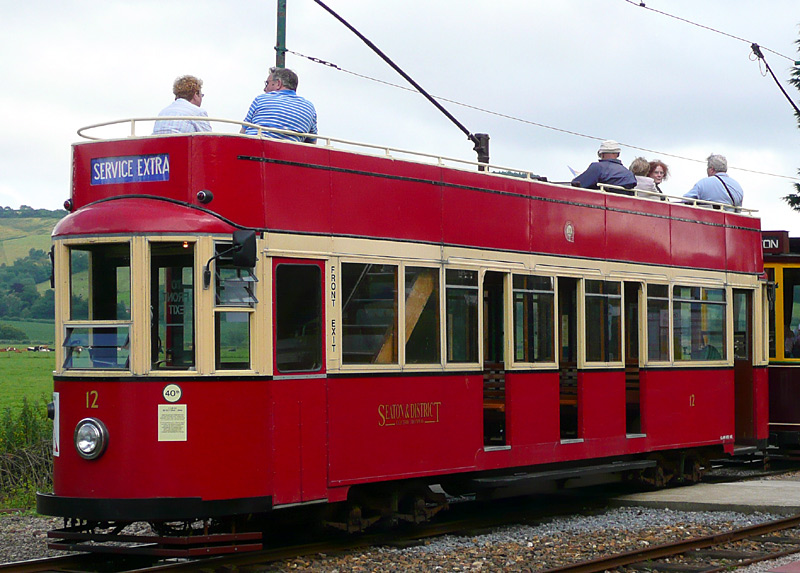
In 1999 Tram No. 12 was rebuilt again and in its current open-top double-deck format looks somewhat like a former
London Feltham tram. Note the straight staircase and wood slatted crossbench seats in the middle of the lower deck.
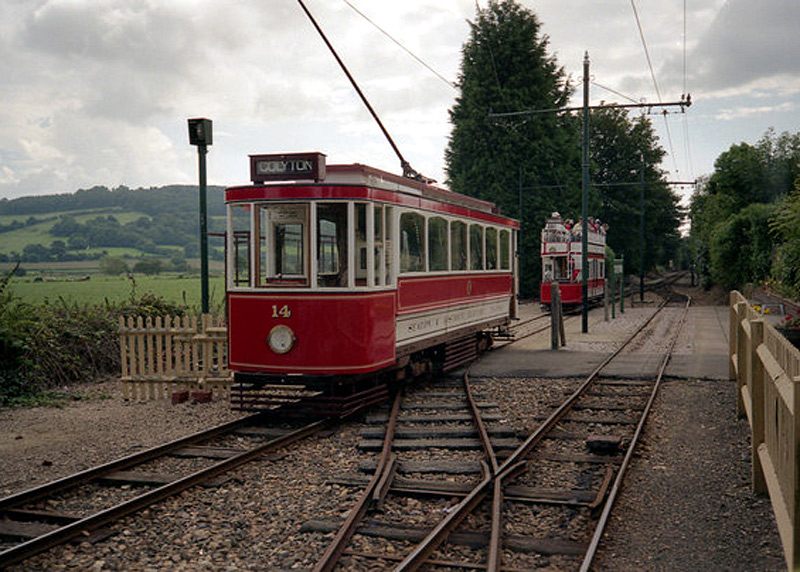
Tram No. 14, at Colyford. This is former Metropolitan Tramways car 94 of 1904.
In 1984 it was rebuilt as a single deck saloon. It seats 27 passengers.
Image & license: Dr Neil Clifton / Geograph Project CC BY-SA 2.0 https://www.geograph.org.uk/photo/820121
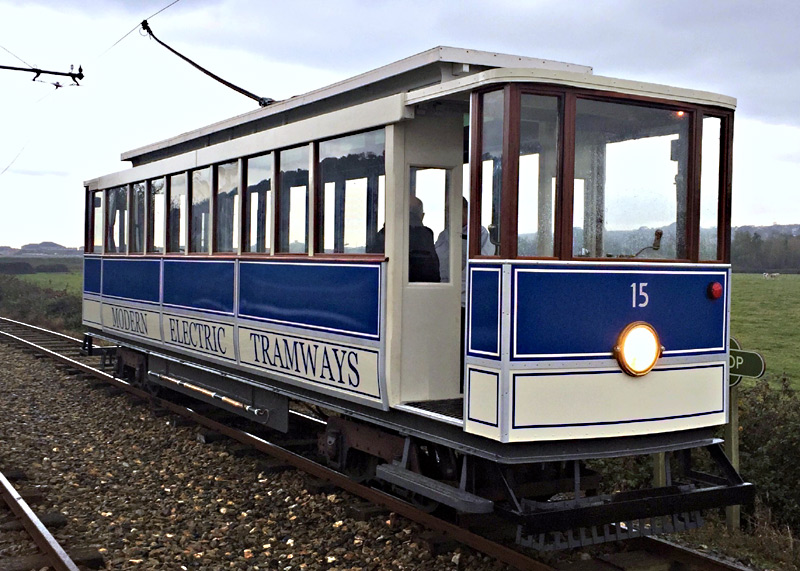
Tram No. 15 is a fully enclosed tramcar in Isle of Man blue and cream livery. Formerly this was tram No.17 - see below.
Image & license: Mrjoshhere / Wikipedia encyclopædia. CC-BY-SA-4.0 https://commons.wikimedia.org/wiki/File:Car_15.jpg
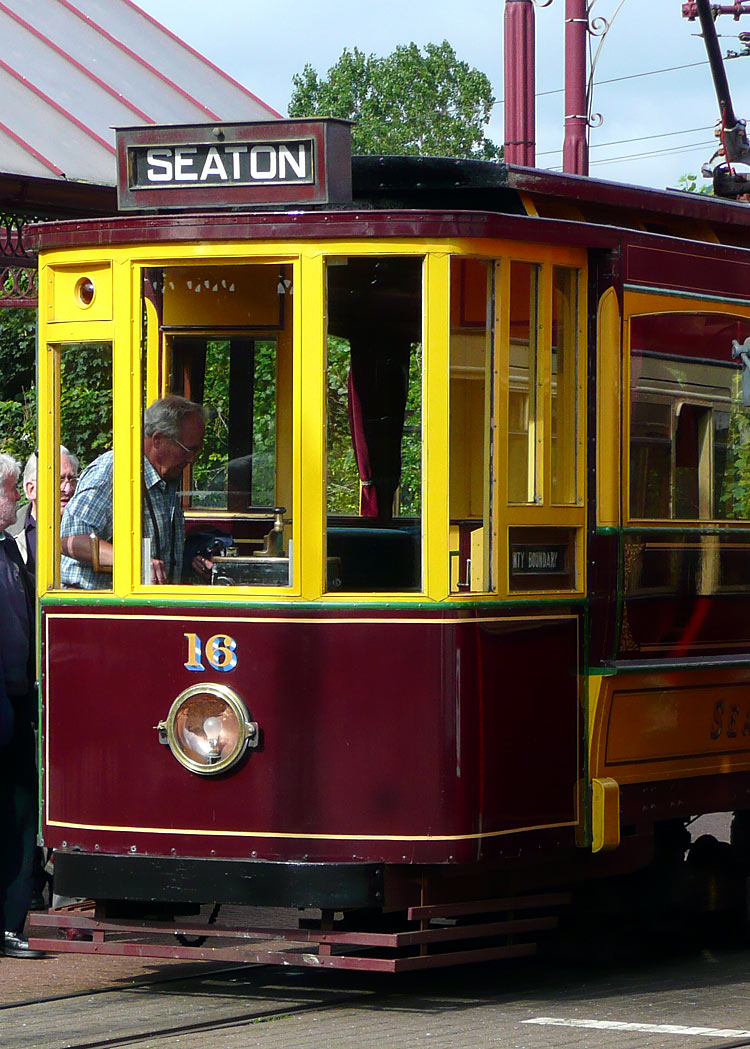
Tram No. 16. This is former Bournemouth Tramways car 106 of 1921 which in 1992 was converted to a single deck saloon. It seats 27 passengers
with a longitudinal bench seat on one side of the tram and a row of transverse seats (with reversible backs) along the other side of the tram.
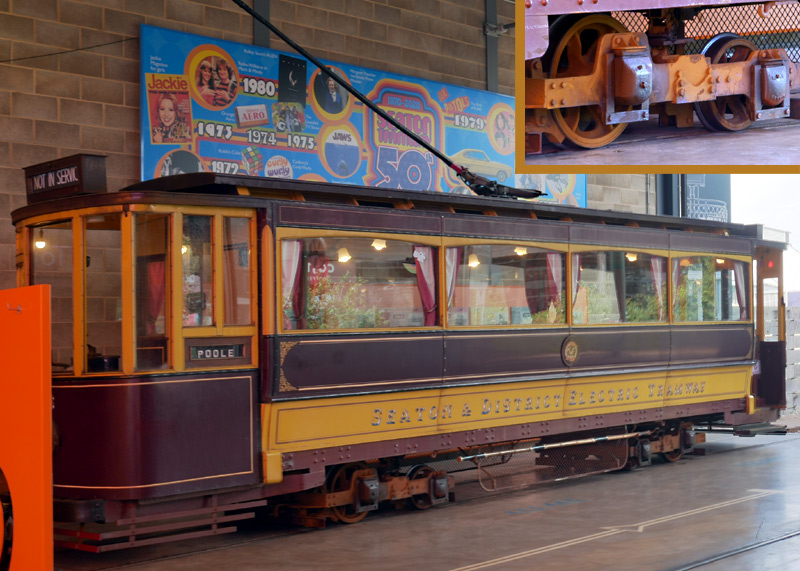
Tram No. 16 not in passenger service at the new Seaton station, plus an insert image showing one of its maximum traction bogies.
Maximum traction bogies (trucks in the American dialect) are a type of wheel / axle arrangement whereby there is one powered driving axle with large wheels and one non-driving axle with smaller wheels. The bogie pivot is off-centre, so more than half of the weight it supports is on the driving axle. The reason for this is that it allows the powered axles to have increased adhesion to the rails and for the tram to still retain twin-axle bogies which offer a superior quality of ride plus greater operational flexibility (and a longer vehicle / body length) than would be possible if it only had simple single axles.

Tram No. 17 dates from 1988 and was designed to look similar to a Manx Electric Railways tramcar.
Despite being a single decker its 'toastrack' seating design gave it a relatively high seating capacity of 48 passengers.
In 2016 No. 17 was rebuilt as an enclosed tram, given the Isle of Man blue and cream livery and renumbered as No.15 - as seen above.
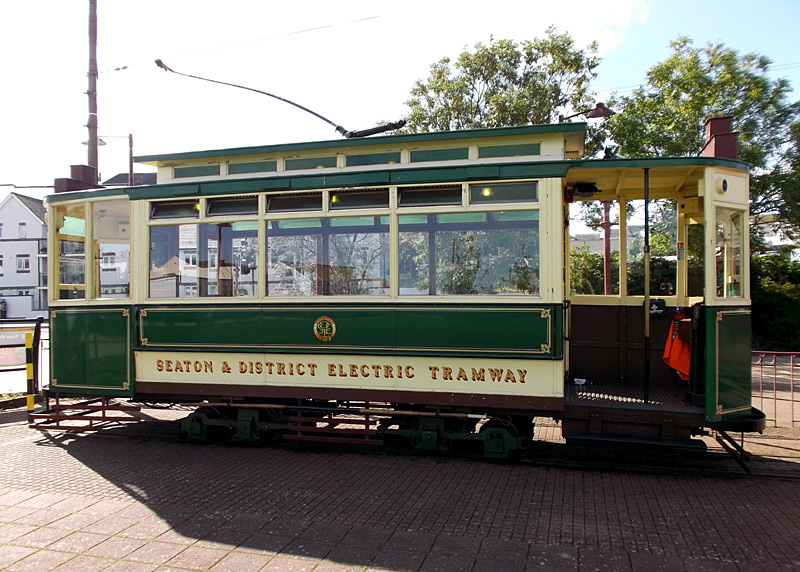
Tram No. 19, at Seaton station is former Exeter Tramways car 19 of 1906 which in 1998 was rebuilt as a green coloured single deck saloon.
It seats 20 passengers. Image & license: OldSteamers / Wikipedia encyclopædia. CC-BY-SA-4.0 https://commons.wikimedia.org/wiki/File:19_at_Seaton.jpg

What it is like to be on an open top double decker when passing another open top double decker...
I was riding No. 12 and the passing tram is No. 11.

All the open top double deck trams which were travelled on feature wooden slatted reversible seating, as seen here.
The Level Crossing
Next to the intermediate station (Colyford Junction) there is a level crossing over a busy local road (the A3052).
Colyford Junction is the site of a passing loop and because this is very close to the level crossing the overhead power supply wires for the opposite directions of travel extend over the crossing. This has been done because it avoids a potential delay to road traffic should there be a dewirement where the overhead wires merge / split into two.

The level crossing is protected by wig-wag flashing lights and an audible alert.

The level crossing is activated on a 'by request' basis by the tram drivers.

The trolleybus-style twin overhead power supply wires are very easy to see in this view which was taken on a southbound tram,
which means that Colyford Junction station is on the other side of the crossing.

The twin overhead power supply wires extend a short way to the north of the level crossing - in addition to the approaching well-loaded
southbound No. 9 this view also shows the ground level wooden 'sawtooth' anti-trespass protection which abuts the level crossing.
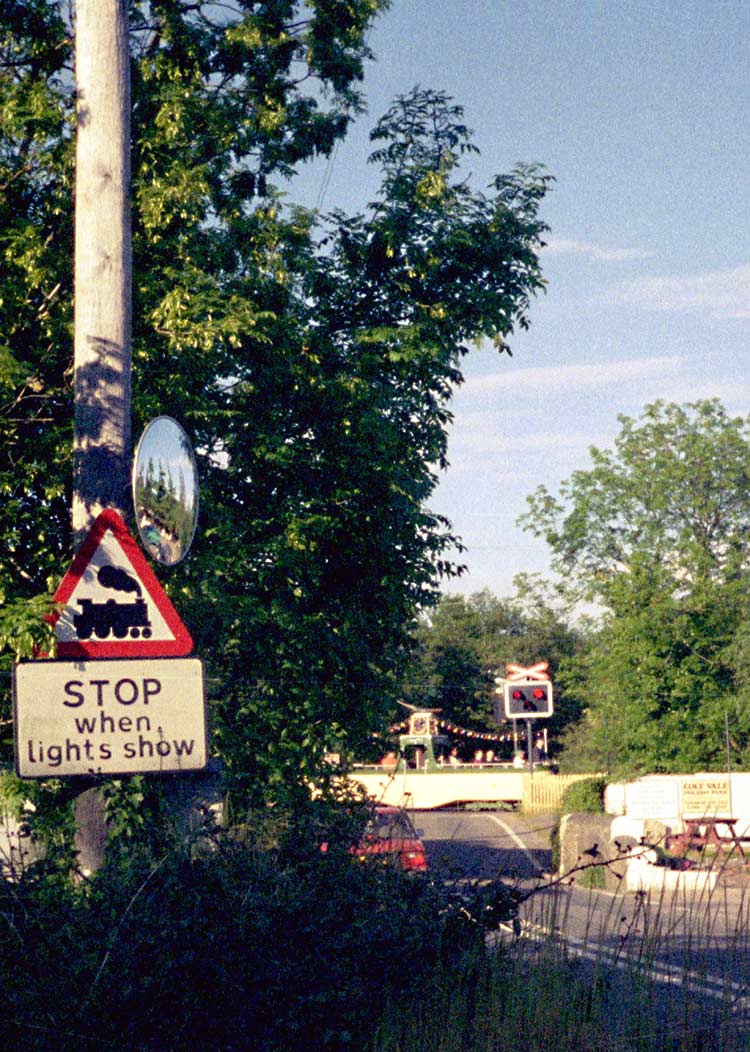
A view of the level crossing from further along the road. The road sign is correct for an ungated crossing which has traditional
railway-style 'wig wag' lights, but it is questionable how the image of a steam engine can be correct for electric trams!
Also seen are Blackpool 'Boat' No. 4 traversing the crossing and on the right some of the pub's outside seating is just about visible.
The image is somewhat grainy so probably dates from my 1996 visit when I was using real film.
Above is a "YouTube" video of tram No. 12 crossing the level crossing. Click the image to see the video,
clicking the symbol to the right of the speaker icon will show the video in 'full screen' mode.
The video can also be seen on the "YouTube" website - the url is http://youtube.com/watch?v=cyoh_KxzUeg
Snapshots Along The Route

A view at the southern end of the line (between Seaton station and the Riverside Halt) where the line features some sharp curves which are effectively
blind bends, which explains why there is a need for a system of control to ensure that trams travelling in opposite directions do not meet each other...

The Riverside Workshop is not normally open to visitors, although thanks to the wonders of computer
technology it has been possible to significantly brighten parts of this image to allow a surreptitious peek inside.
We can see tram No. 2 (far right), No. 17 and what is probably works tram No. 02 (far left).
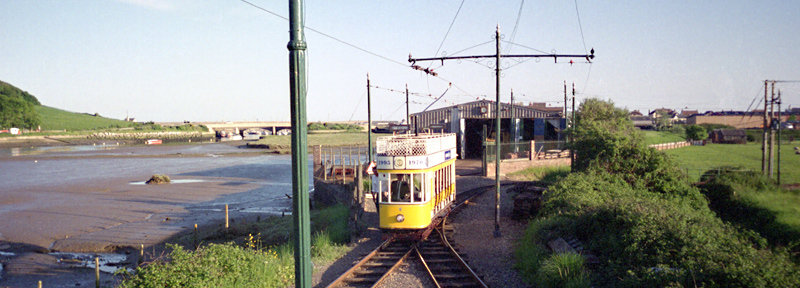
On a late summer evening working northbound No. 8 passes in front of the Riverside Workshop.
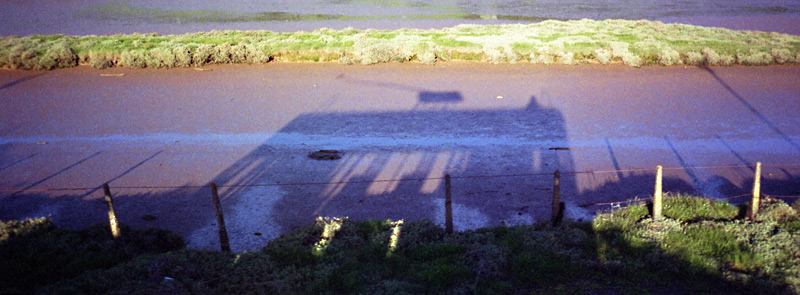
The (very) late evening summer sun casts long shadows over the River Axe. My shadow can be seen on the tram's top deck!

Across the River Axe can be seen the village of Axemouth and St. Michaels Church.

The pretty village of Axemouth, which is on the main road to Seaton. I waited for a gap in the traffic before taking this photograph.
It is probable that in 'olden times' the waterway seen between the houses on the left and the roadway would have been used
as both a source of drinking water - and as a sewer.

Carrying what looks like a full compliment of passengers No. 8 wearing bright pink
Breast Cancer Awareness livery is seen on a northbound working from the other side of the River Axe.

Clear line ahead.

A reminder of the days when this was the route of a mainline railway.

One of the many passing points, tram No. 12 and the back of the distant signal seen in the image above.

Twitchers paradise - the tramline passes several hides which allow ornithologists
to enjoy their hobby without disturbing the birds they have come to see.
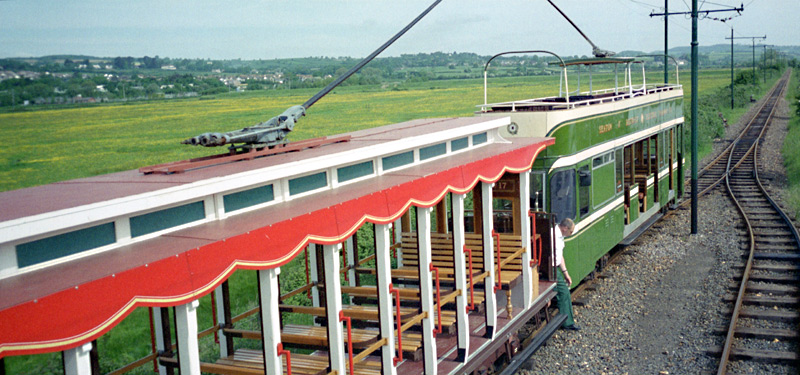
This view from the top deck of a passing tram showing tramcars No. 17 and No. 12 in what are now
historic formats was taken on real film - so probably dates from my 1996 visit to the tramway.
It is possible that these trams were shunting prior to being parked in the Riverside Workshop building for the night - this
would help explain why they are both empty and have their trolleypoles facing opposite directions.
This view is also useful as another visual overview for better understanding toastrack / crossbench seating - also note the wooden
safety rails at each end of the seats, their purpose being to help prevent passengers from falling out during the journey.

Only part of the route is alongside the river, elsewhere it passes through lush countryside.

The joys of a telephoto lens - normally two trams travelling in opposite directions approaching each other
on a single track section of line could be a problem ... however between us is an unseen passing loop!

A system map / information poster. The writing is legible on the largest version of this image. Click here
to see the largest version of this image in a new window. Note
that it is 1000 pixels wide and just under 460kb in file size. Some web browsers will require that you expand the image to see it full size.
More information about The Seaton Tramway can be found at these links:
http://www.tram.co.uk/
http://en.wikipedia.org/wiki/Seaton_Tramway .
Click letterbox  if you wish to send me an email.
This page is a branchline off the main website so after viewing it should be closed - however in case you arrived here courtesy of a search engine then this link will take you to the Albums pages index http://citytransport.info/Album.htm and this link http://citytransport.info will take to you the opening page of this website.
This page last updated 1st January 2025
E & OE.
© Copyright 2001 - 2026 Simon P Smiler and named image sources.
Privacy Policy.
